Monday, April 4, 2011

Oregon 2011 - Conclusion

Sorry that I'm dragging these updates out. It is a mixed bag of emotions as I recap our trip. It is almost as if I am reliving our short time back home. In doing so, I also re-live all  the emotions that go with it: the anticipation, the joy, the fun, the excitement, the closeness, and of course there is the sad.

Anyways, back to the recaps. Last time I left off with a tasty snack at Mojo Crepes. As the clock drew closer to 4pm, Jake and I parted from the sibs and headed west to meet up with some of my oldest and closests friends. Two families: the D family and the B family is how I will refer to them.

I HAVE to see them on every trip home. Not only to see my friends, but also to see their kids. First up, the D family. I have known K since the first day of high school. I met C in college. They have two of the cutest little boys, B (4 years old) and S (he just turned 2!). Now for family B. Funny story. I actually first met J the summer before senior year of high school at engineering camp. Yes, we are giant nerds, we know. I remember meeting L just before the first day of college at one of our scholarship banquet dinners. Back before they booted me from the scholarship program. That is a story for another time. Come summer time, all of us ran in the same circle. And we have remained friends ever since. Oh J and L have a beautiful little girl who is also 4 and they are expecting a new bundle of joy in July. It was tough to say goodbye at the end of dinner. The next time we see the D family will be in August and the next time we see the B family will be next year as they will not be flying out to Boston.

Once we were home, I concentrated on packing up my bags, while Jake hung out with the sibs. I am not an emotional person. If anything, I am your stereotypical engineer that just likes to deal with facts, none of that emotional, touchy, feely mumbo jumbo. I barely shed a tear when my parents dropped me off at the airport when I took the one way flight to Boston. But this time, it was different. I could barely hold it together. I did not want to say goodbye. I did not want to leave. I also did not want to go to bed. Going to bed meant that morning would come. And with morning, our flight back to Boston would come.

Well, morning came. Suffice to say, I was a huge mess at the airport. I was doing pretty well until TSA took my very expensive bottle of conditioner that I purposefully purchased in OR to save on taxes. It was 5 oz! I mean come on. Boston's TSA let me thorough security with 10 oz bottle of detangler! Oh yea, PDX took that away from me too.

Until next year...


Did you miss a day?
Oregon 2011 - Day 4
Oregon 2011 - Day 3
Oregon 2011 - Day 2
Oregon 2011 - Day 1

Sunday, April 3, 2011

Project Mustache


Materials:
3/16" wooden dowels - ($2.49 - 25% off + tax = $1.99)
9"x12" black felt - ($0.29 - 25% off + tax = $0.23)
3/16" black foam board - leftover from Project Bubble
mustache templates (here, here, and here)
exacto knife
hot glue
white gel pen, chalk, or fabric pencil


The felt I picked up from the local craft store was really flimsy. I wanted a way to stabilize it. I could have followed Lisa Welge's tutorial and used hot glue or used craft foam sheets as suggested by Tiffany Kelley, but of course I can never do things the easy way and I also wanted to use up leftover pieces of the foam board from my previous project.

I took mustaches from each of the templates, cut them out, traced them onto the foam board and cut them out with the exacto knife. This was a very painful and tedious process as mustaches are not straight lines. 7 mustaches later and not a single cut on my fingers and hands, I call that a great accomplishment. P.S. I was a bit neurotic and chose to make sure to cut off all the white pen marks.

Next, I traced the templates onto the felt and cut them out. I probably should not have used my gel pen, but I was too lazy to go find the chalk. Of course a fabric pencil would be a much better choice to begin with.

After everything was cut out and lined up well, the felt was hot glued onto the foam board. Originally I wanted to have felt on both sides, but after talking to my friend S, she reminded me to keep things simple (duh!) and that trying to figure out how to hide the wooden dowel was not worth the effort. (Hi, S! And thank you!)

Lastly, the dowels were glued on at an angle. Why at an angle? Have you tried to hold something up to your face while keeping your elbow straight down? Kind of difficult right? Exactly.

Eat your heart out Etsy, the grand total for this project comes to $2.22!

Friday, April 1, 2011

Nursery inspiration

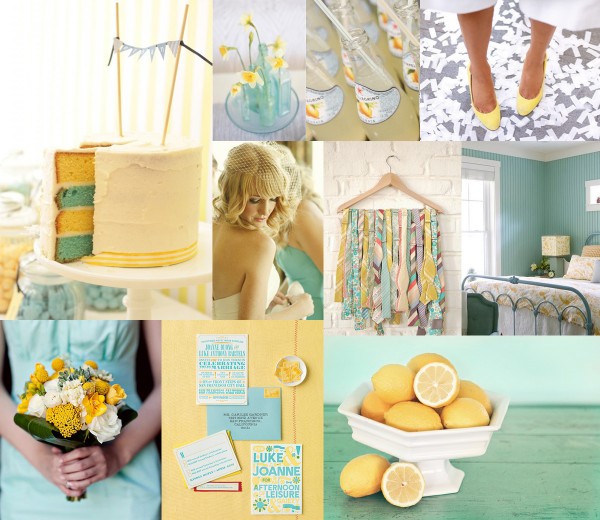
This colorful story board totally inspires me:

via Elizabeth Anne Designs 

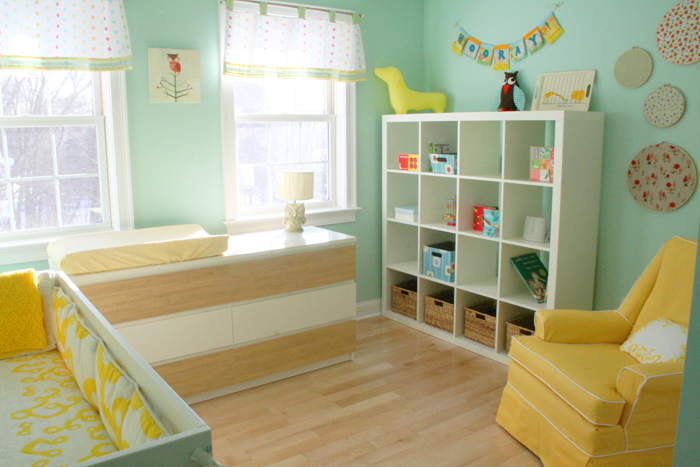
Wouldn't it make for the cutest baby girl nursery? Wait a minute...

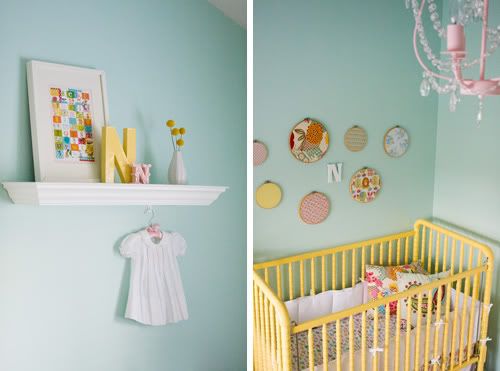
via Me and Wee. Click on the photo for more photots.

via Armelle Click on the photo for more photots.

Oooof, did I just go there? Yeup, I went there. Now I just need inspirations for a boys room...

******** NO we are NOT expecting ********


Thursday, March 31, 2011

Oregon 2011 - Day 4

Last day. *sigh* It started much like the previous days, only slightly later. My internal clock was finally getting in tune with pacific time. Yeah, just in time for us to get on a plane and go back to our life on eastern time, right?

Anyways, we met up with the "extended" family for a dim sum (chinese tapas) lunch at Legin Restaurant. Do not go here if you are ever in PDX. The food is just OK, it's cheap, but it's not as good as say, Wong's King. During lunch we handed out printed save-the-dates to those that I did not have email address for (aka, all of them). And as I talked about before, folks were thoroughly confused and thought we were handing out the invitations. It probably did not help that I just handed them the printed photo with no words or anything. OOPS!

Us kids (and my mom) ditched the adults (aka dad and his friends) to take advantage of the Adidas employee store. Whoohoo for 50% off retail! I lost track of how much time we spent there. I also did not want to keep track of how much I was spending while I was in there. Suffice to say, I was good and did not buy a ton of stuff, but both Jake and I made purchases that we will put to good use. 

You guys remember Ked's? I remember that I just HAD to have them in my youth. But my parents were kind of broke so I ended up with knock-offs that my god parents brought back from China for me. Well, apparently they are making a comeback. See exhibit A from JCrew:

JCrew

Anyways, I scored myself the Adidas version for $25. Whoohoo! I normally wear shell-toes. And I would have gotten a pair of the "keds" and the shells, but but I decided against a second pair for the sake of the wallet (even though they were 50% off) and the sake of my suitcase. Now that is what I call self control. *pats self on the back*

Shopping makes me hungry, how about you? After working up an appetite and not wanting to end our joyous hanging out session, we sibs (keep in mind this is me, Jake, both my brothers, my brother's girlfriend, my "adopted" brother, and my mom) decided to grab a snack at Mojo Crepes. Um, HELLO! Crepes and ice cream, together?!?! HEAVEN!

Left column: (top) Jake digging in. (bottom) A and P (my newly "adopted" brother).
Middle: Mojo - nutella, strawberries, bananas, and vanilla ice cream.
Right: (top) Crepes menu. (bottom left to right) Harris being all asian , wall art.

****This is getting a bit long. I'm going to break this post up into two. Stay tuned for the conclusion.***


Did you miss a day?
Oregon 2011 - Day 3
Oregon 2011 - Day 2
Oregon 2011 - Day 1

Tuesday, March 29, 2011

Project Bubble

We interrupt the Oregon 2011 recaps to share the latest craft project. Oh believe me, it's a good one!

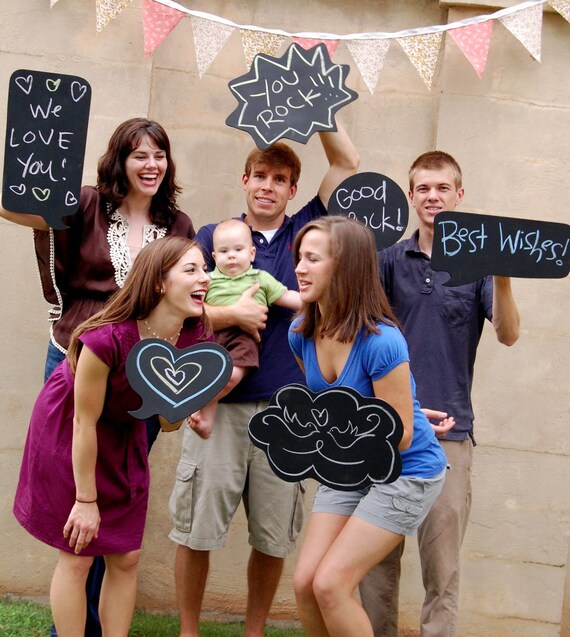
Have you seen these awesome chalkboard speech bubbles? They are the latest rage in photobooth props.

Playing Grown Up on Etsy

Well, they may be awesome, but they come with a hefty price tag. Two of the speech bubbles shown in the photo above will run you $52! It is fabricated from wood, so in theory, they are heavy duty and should last quite a long time.

Buuuuuuuuuuuuuuuut, get this, you can make your own for way less! Jordan Ferney's super crafty sister figured out how to make them for a fraction of the cost and not out of wood. For step by step instructions with photos, see Joran's blog post, DIY chalkboard talk bubbles from Oh Happy Day.

Following the tutorial, I was able to create 6 good sized bubbles

Here is my materials list:
  • 2 Elmers 20"x30" black foam core boards - $7.95 (company screwed up and gave me my money back, but did not refund the shipping charges)
  • 1 box of 12 count white chalk - $0.79 (+tax)
  • 1 box of 12 count colored chalk - $0.79 (+tax)
  • Boning knife (or some other straight edge used to smooth out the contact paper)
  • Exacto knife
  • Styrofoam sewing spools (free!)
  • Gray acrylic paint (leftover from Project Yay)

Cel's Tips:
  1. Apply contact paper in small sections and use a straight edge to smooth out the contact paper.
  2. After applying the contact paper to the foam board, allow it to sit over night. I let one board "cure" and did the second one immediately. Both work, but the edges of the contact paper will stay down if you give it more time to adhere.
  3. Use your exacto knife in small strokes with equal pressure. Go over a cut a 2-4 times. If you try to brute force it, you will end up with jagged edges and little pieces of foam everywhere, plus you get less precision.
  4. I read this somewhere, treat the surface of your new board by coating it with a layer of chalk dust. I scribbled all over each board, rubbed it in with a dry paper towel, and then wiped each board clean with a damp paper towel.
After completing the bubbles, I patted myself on the back, but realized that I was not done with the project just yet. I needed a handle on the back. I looked through the craft store for ideas. Originally, I thought about just buying prefabricated pieces of wood to use as a handle. But I realized that the wood would be pretty heavy relative to the board. Also, none of the pieces I found were the right size. While browsing for a new crochet needle, it dawned on me that sewing spools were about the size I was looking for, and I had some at home to boot!

Now, I do not sew, but I do have a VAST collection of cross stitch/embroidery thread, some of which is on spools. Long story short, I learned how to cross stitch around the age of 12, maybe as early as 10. While I stopped when I started high school and cross stitching is a granny activity, I cannot bring myself to throw out my supplies.

Some of the spools were styrofoam, which is exactly what I was hoping for. They were old, grungy, and ugly. So after unwinding all the thread from them, I painted them with leftover paint and hot glued them onto the back of the boards. Yay for using my hot glue gun for the first time since 8th grade (another object that I am super glad I did not throw out when I moved to MA).

Styrofoam sewing spools

Painted spool glued to the bag of the speech bubble.

Painted spool

Not too shabby for a grand total: $21.52 and an afternoon of work.